|
This is my newest arcade project.
A French CBS Scart Colecovision in a self made new Arcade Cabinet.
The project was started in April 14. 2012, and expected to end around
August/September 2013.
But it was first ended around 2016.
"I grew up
together with the arcades!"
I was born in the beginning of the 60's
So I have followed the development through the ages.
So feeling game play through an Arcade cabinet feels more real for me.
So now I'm started on a new ColecoVision arcade project, this time
is my
cabinet a smaller type.
I use some of the parts from the earlier project 2, therefore
will the new cabinet be same wide but only 40 cm. ( 16" ) deep.
( the old was 30" ).
The New ColecoVision Arcade is built from scratch.
What's inside:
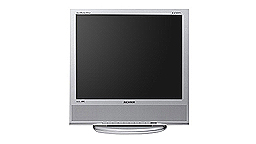
A 19" 2005 4:3 LCD from Samsung, Syncmaster
910 MP with Scart, RGB and VGA connector.
My French CBS ColecoVision from 1983 with Scart Output (Peritél / RGB).
The Super Game Module (SGM) from OpCode Games.
An older 200 W. PC Power Supply, Fortron/Source.
2 x 4" Car speakers from XZound 2012, T. Hansen # 43603, 100Hz. to 20KHz.
5" Woofer, Biltema 2012 Art. # 24-000, 20Hz. to 160Hz.
2 x Arcade enablers 2012 PCBs from Harvey deKleine, Canada.
Almost the same Joysticks and buttons from Project 2.
The 2 buttons, Player 1 and Player 2 from project 2 are not mounted, because I
use 2
Champ adaptors CA-340, they have all the key buttons and the option to insert overlays.
The cabinet provides also a small space,
which will include the Driving module, Atari Converter, Remote control and the AtariMax SD
ultra.
Extra for the new control panel is the Super
Action features.
There is added 2 (4) extra fire buttons especially for use for the games
Spy
Hunter,
Rocky and
Front Line.
Also 2 buttons for the Pinball game and Sega Flipper is mounted on the each side of the cabinet.
As you can see is Roller Controller a part of the control panel.
I will later also have the opportunity
to connect the driving module.
It will be a kind of an add on/off solution. |
|
Images below.
Later in 2020 will there be bigger images to click on.
 |
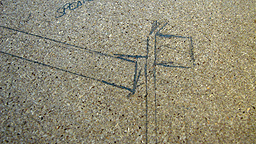
Here can you see the separation of the
old cabinet
from Project 2. |
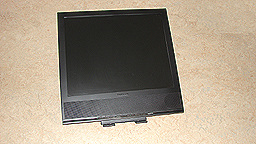
The 19" 4:3 LCD Samsung I use in my project. |
 |
| |
|
|
|
 |
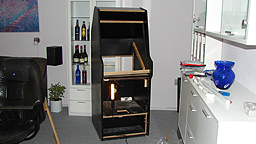
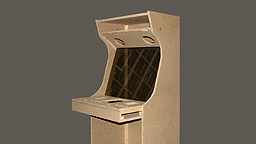
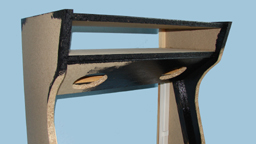
The new cabinet is a tight
solution.
The height is 160 cm. 64" , width 57 cm. 23"
and only 40 cm.
16" deep. |
Everything can just fit inside, with a minimum of space. |
 |
| |
|
|
|
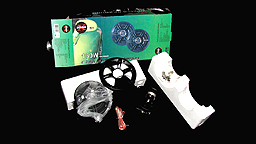 |
2 x Speakers from X Zound in China. |
#
43603/PY-IN 1012 |
 |
| |
|
|
|
 |
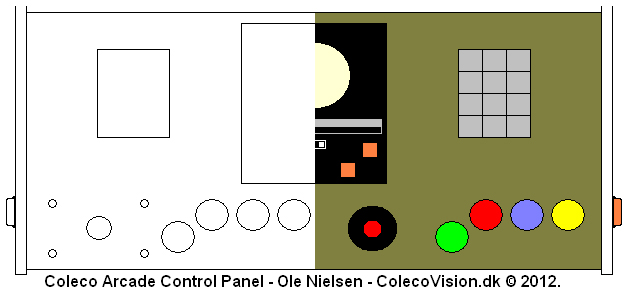
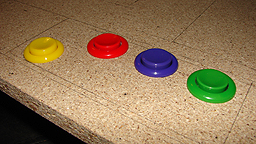
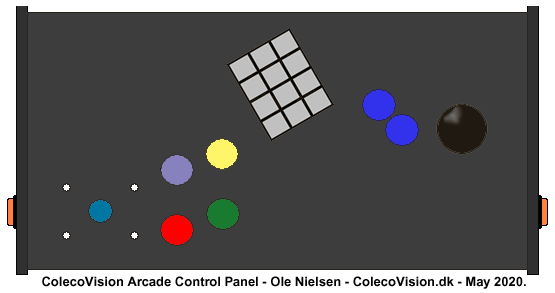
Buttons from ArcadeShop.de
The Red and the Green button do I already had. |
The Purple and the Yellow one is new,
and
2 Orange buttons is for the side panel.
Best for Roller Ball and Sega Flipper. |
 |
| |
|
|
|
 |
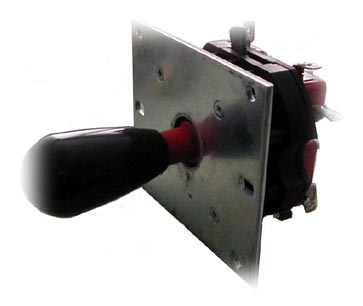
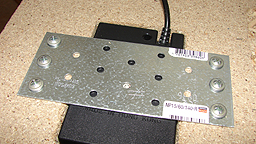
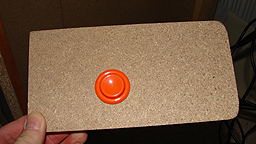
Here are the Roller Controller tested to
see if it fits in the hole.
Roller Controller will be mounted from the bottom. |
I separated the Roller Controller,
because the Roller Controller must be able to fit into my new
control panel. |
 |
| |
|
|
|
 |
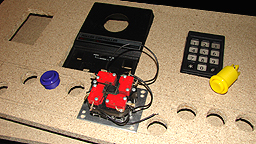
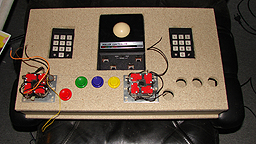
Here can you see the Champ Keypad Adaptor
mounted. |
Roller Controller is milled down into the wooden board,
same is the 2 joysticks. |
 |
| |
|
|
|
 |
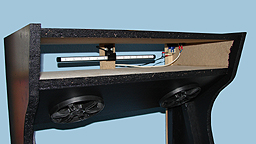
A piece of wood
for the speakers. |
Here are the 1st
Car Speaker mounted, just to see if it fit proberly in the hole.
There is two of them, and the sound is supported by a
woofer.
So the sound for my new ColecoVision Arcade is really superb.
It will ferform both the SN and the AY sound in both speakers. |
 |
| |
|
|
|
 |
Assemble some of
the cabinet.
I was started with one side (left) and the top for the light and marquee. |
You can see the plate for the car speakers mounted. |
 |
| |
|
|
|
 |
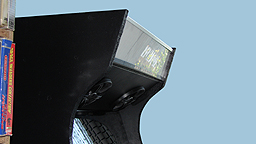
The Arcade cabinet is now taking shape. |
A sample of the new marquee.
It is placed in front of the room above the speakers.
The final design is with a black border around the text. |
 |
| |
|
|
|
 |
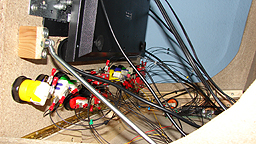
Electronics from
Harvey deKleine in Canada.
The electronics distribute signals inside the control panel.
2 set is used each for Player 1 and 2. |
Both Controller PCB's shall distribute signals to two Joysticks,
The Roller Controller, 2 Champ keypads and
10 Buttons.
So at least 36 wires to solder alone in the control panel. |
 |
| |
|
|
|
 |
DC 5V. Out and Audio Out, SN direct from the Chip.
Maybe I will have to change that again,
and take the output from the inside Scart Connector.
Reason to this will be the Super Game Module.
I need combined sound or PSG sound from each speaker.
Latest: Both AY and SN sound in each speaker.
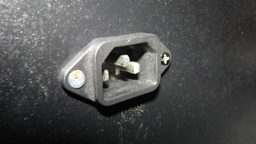
A little change in the ColecoVision PCB. |
A PC power connector is mounted. |
 |
| |
|
|
|
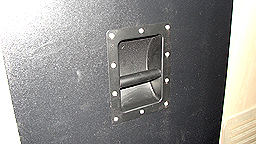 |
A carrying handle on the back of the
cabinet. |
A side button for RollerBall, and Sega
Flipper.
The side buttons is also used as Fire 1 and Fire 2. |
 |
| |
|
|
|
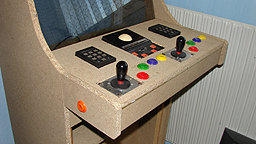 |
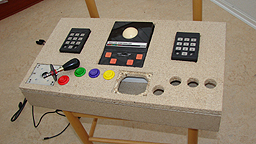
The 2 player Control panel in its final layout.
There will Subsequently be mounted an acrylplate. |
On the right, many wires as usual.
36 wires + 6 DB9 connectors. (2 x 3 wires).
2 from ColecoVision to Roller Controller.
2 from Roller Controller to the enabler.
2 from the Enabler to Champ adaptors.
1 for DC 5V.
And finally 1 for Reset. |
 |
| |
|
|
|
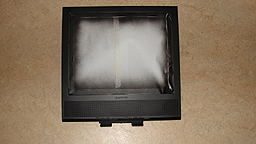 |
The Samsung
Tv/Monitor after it is painted |
And
after removing the protection. |
 |
| |
|
|
|
 |
Started with
some
painting on the cabinet. |
Diode light (LED) for marquee.
Speaker is mounted.
Note Main Power switch and Reset on the top. |
 |
| |
|
|
|
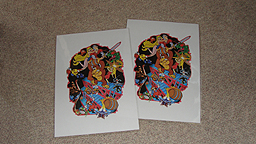 |
Some small side
art in A4.
There is more, but this is a start. |
The plexiglass is milky white for the upper marquee. |
 |
| |
|
|
|
| |
2019.
Roller Controller
is now removed, and a new design for the
Control panel will be updated.
Latest: I will redesign my control panel
for my ColecoVision Arcade, and instead of the Roller
Controller will I use the
upcoming Spinner Controller from CollectorVision
Games later in 2019.The new CollectorVision Phoenix Video Game System
will be replaced instead of the Original French CBS Scart ColecoVision
Video Game System.
But there is no analog Audio out
from Phoenix to my Speakers in the ColecoVision Arcade.
So I planned this:
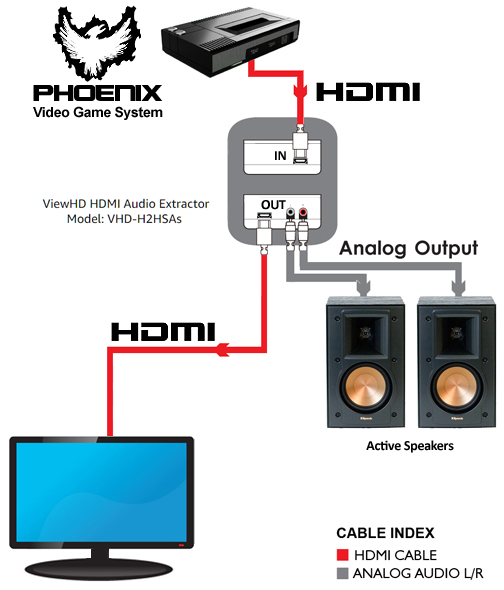
ColecoVision.dk found a solution on the Internet, I simply need an Audio
Extractor.
I will have to remove my RGB
Scart cable from my French CBS ColecoVision, which instead should be replaced with 2 new HDMI cables
via the Extractor.
Also removed will be my old 4:3 Samsung Monitor and a new 16:9
Samsung will be replaced.
As you can see on the picture below, my French CBS ColecoVision is heavily
modified.

Scart RGB cable will be removed.
Extern Reset will be moved from the French CBS ColecoVision to the new CV Phoenix.
+5 Volt out will be removed.
Audio left and right will be removed to the new Audio Extractor box.
No need for ColecoVision power supply, and the old French ColecoVision
for now.

For my RCA / Phono analog Audio out.
HDMI pass through.
The box needs power +5V.
For my new 2019 project will I use the same Arcade Cabinet, but a
new Control panel.
One new Console, this time the Phoenix Video Game System.
This system can take original ColecoVision game cartridges as well
as games on SD card.
The new system is an FPGA based system and can playback almost all
ColecoVision games plus a lot of Atari 2600 games via SD.
I will also use another TV as an Monitor. (Scart / VGA / RF / HDMI /
RGB).
My old Samsung 4:3 had no HDMI connector so it says itself.
So I will use my other 16:9 23,8" Samsung which have HDMI and all
other things input, but no Audio outputfor active speakers.
So with the Audio Extractor from ViewHD, I will could take the audio
direct to my Subwoofer mounted in my ColecoVision Arcade, which is
connected to the upper Speakers. When I have the details for the new
CollectorVision Games Spinner Controller,
then I will start up my new Control Panel design.
2020. No it didn't
work, still no sound. The Phoenix console need an output update via HDMI, so the sound can
work seperate together with the Audio Extractor.
So for now I have the sound from my 24" Samsung Tv. in the cabinet
which I think it's not optimal. A solution I will try is an HDMI
to VGA adaptor which also have the analog
audio output.
The signal is HDMI in and VGA out.
My 24" Samsung Tv. can handle VGA too. [ picture on the way
soon ] There is no news regarding the Spinner Controller,
but a working unit exist as you can see on the picture below.

I have already designed my new updated Control Panel with the
spinner marked on.
And on the picture below is also mounted 2 seperate pushbottons for the
Spinner.

So my new Control Panel "looks" like an Pandora's Box, but it's
not. ;)
I have now changed it from a 2 player to only 1 player. 1 - ColecoVision
Champ
keypad.
1 - Joystick From IL Spain.
8 - Pushbottons with Microswitch.
1 - Spinner Controller, -soon. I will work on this again from May / June 2020.
A new and maybe my last control panel design was made in May 2020.
Still need a Spinner Controller for some of my games.

2020 / 2021. Our apartment is
to be completely renovated and we are to be rehoused in another
apartment elsewhere in the city.
Therefore, everything has to be packed up, which was very stressful.
Received my DK3 and Opcode Vision #1 on the new address, also
received CollectorVision Club 2021.
Warp Warp + Eggerland Mystery and a Harddisk crash.
That HDD crash almost took my life, it was some of the hardest you
can imagine.
Luckely a part of the HDD could be saved, but I lost my major M DB
and my CD DB + a lot collected CV stuff. From November 2020 to
October 2022 I have not played on my CVA at all.
We are back in our new total renovated apartment with FiberNet from
Norlys, former StofaNet.
Everything is changed, also outside with a new environment.
2022 / 2023.
Only played CV games on various emulators.
But also updated the ColecoVision.dk site with a new design which
took several months.
Some of the new updated pages was lost in the HDD crash and are
probably not even updated yet.
2023.
I've gone into the thinking box to see if I can make a homemade
Spinner Controller.
So I have separated one of my Turbo Driver Units for using the parts
inside.
So let's see what i can came up with.

This is the plan I will go for ...soon...


As you can see, the hole is drilled and the ColecoVision Steering
Whell with the photodisk is in place.
Also the PCB is in its place and + 6V connection, so now I need some sort of rotary knob to
test with.
The handle or knob to test with comes from a cabinet or drawer.
2024.
I owe to say that this applies to the CollectorVision Phoenix VGS
Console connected to my CVA.
I can now confirm that the ColecoVision
Steering Wheel parts do not work with CollectorVision Arkanoid as
desired, it lock the game immediately.
It does work with ColecoVision's original
Turbo and also Team Pixelboy's Kaboom!
So if Arkanoid should work properly with CollectorVision Phoenix VGS
via the Turbo Module PCB, will Arkanoid need a reprogramming and
possibly some code from the game Kaboom!
|